Create a stop-motion video with Premiere Pro
Adobe Premiere Pro
🕑 This lesson will take about 7 minutes
In this lesson, you will learn how to create a stop-motion video using Adobe Premiere Pro. Stop-motion is a popular animation technique in which small incremental changes are made in each individual frame, creating the illusion of movement when the frames are played back in sequence. With Premiere Pro's editing tools, you can easily create your own stop-motion videos, even if you don't have any prior experience with animation.
We will walk through importing images for each frame, editing the stop-motion video, and exporting your finished video. By the end of this lesson, you will have the skills and knowledge you need to edit your own stop-motion videos using Premiere Pro.
Is YouTube blocked at school? Watch the video here instead.
Here is a summary of the steps involved:
Step 1 - Create new project.
Step 2 - Drag your images into Premiere Pro project import area. You can also drag an entire folder in or move the images to a bin to organise them (right-click to create a new bin/folder) if necessary.
Step 3 - Select all images (shift-click) and then right-click and select Speed/Duration from the menu.

Step 4 - Change the duration of each photo to the desired speed. Eg. 00;00;00;02 (2 hundredths of a second). Click OK.
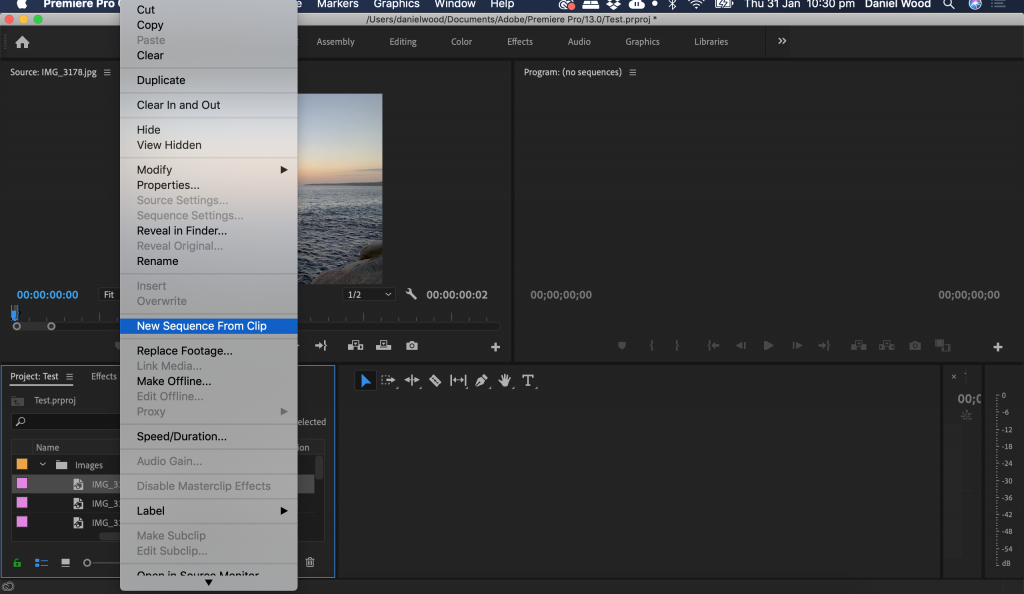
Step 5 - Right-click just the first image and click New Sequence From Clip.

Step 6 - Now select all other images (excluding the first one) by shift-clicking and drag them onto the timeline after the first image.
Step 7 - Click Play and watch your stop-motion animation!
Next lesson: Green screen with Premiere Pro