Using the Loft tool
Computer-Aided Design (CAD) with Onshape
🕑 This lesson will take about 9 minutes
In this lesson, you will learn how to use the Loft tool in Onshape. This tool allows us to create smooth, organic 3D objects by blending between two or more profiles. You can use the Loft tool to make a model gradually change shape from one end to the other. For example, a 3D model might be square at the bottom and circular at the top. You can use two or more shapes with the Loft tool and you can also create a path for the shape to follow when it is extruded.
To begin, we will start by creating a new document in Onshape and drawing two or more 2D profiles using the sketch tools. These profiles will be used as the cross-sections of the 3D object that we create with the Loft tool. Next, we will select the Loft tool and specify the profiles that we want to blend together. We can preview the resulting 3D object and make any necessary adjustments to the orientation of the profiles or the shape of the loft.
We will also look at how to create a path for the shape to follow when it is extruded using the Loft tool, and you will learn how to create offset planes which will come in very handy for your drawings.
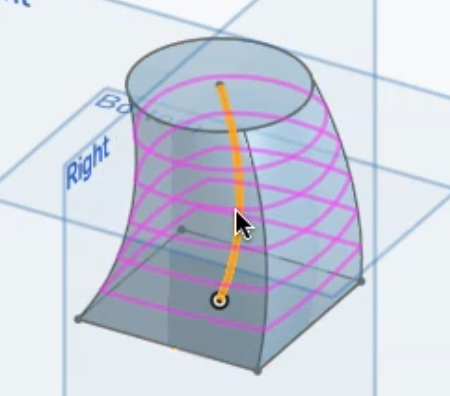
The examples below show a 3D model that changes from a square shape at the bottom to a circular shape at the top, a 3D model that follows a curved path as it changes shape from the bottom to the top, and a 3D model that uses 3D shapes (square at the bottom, rectangle in the middle, and circle at the top.


Watch the video below to learn how to use the Loft tool in Onshape.
Is YouTube blocked at your school? You can also watch the video here.
Next lesson: Fillet and chamfer