Using a push button and Arduino to control an LED
Arduino Uno tutorials
🕑 This lesson will take about 20 minutes
In this lesson, you will learn how to turn an LED light on or off using a push-button (switch) and an Arduino board.
Required parts
You will need the following parts:
1 x Arduino Uno
1 x Breadboard
1 x LED light
1 x Push button
1 x Resistor (10K Ohm) for the button
1 x Resistor for the LED (can be any value between 100 Ohms and ~10K Ohms). We will use a 220 Ohm resistor in this example.
7 x male-to-male jumper wires
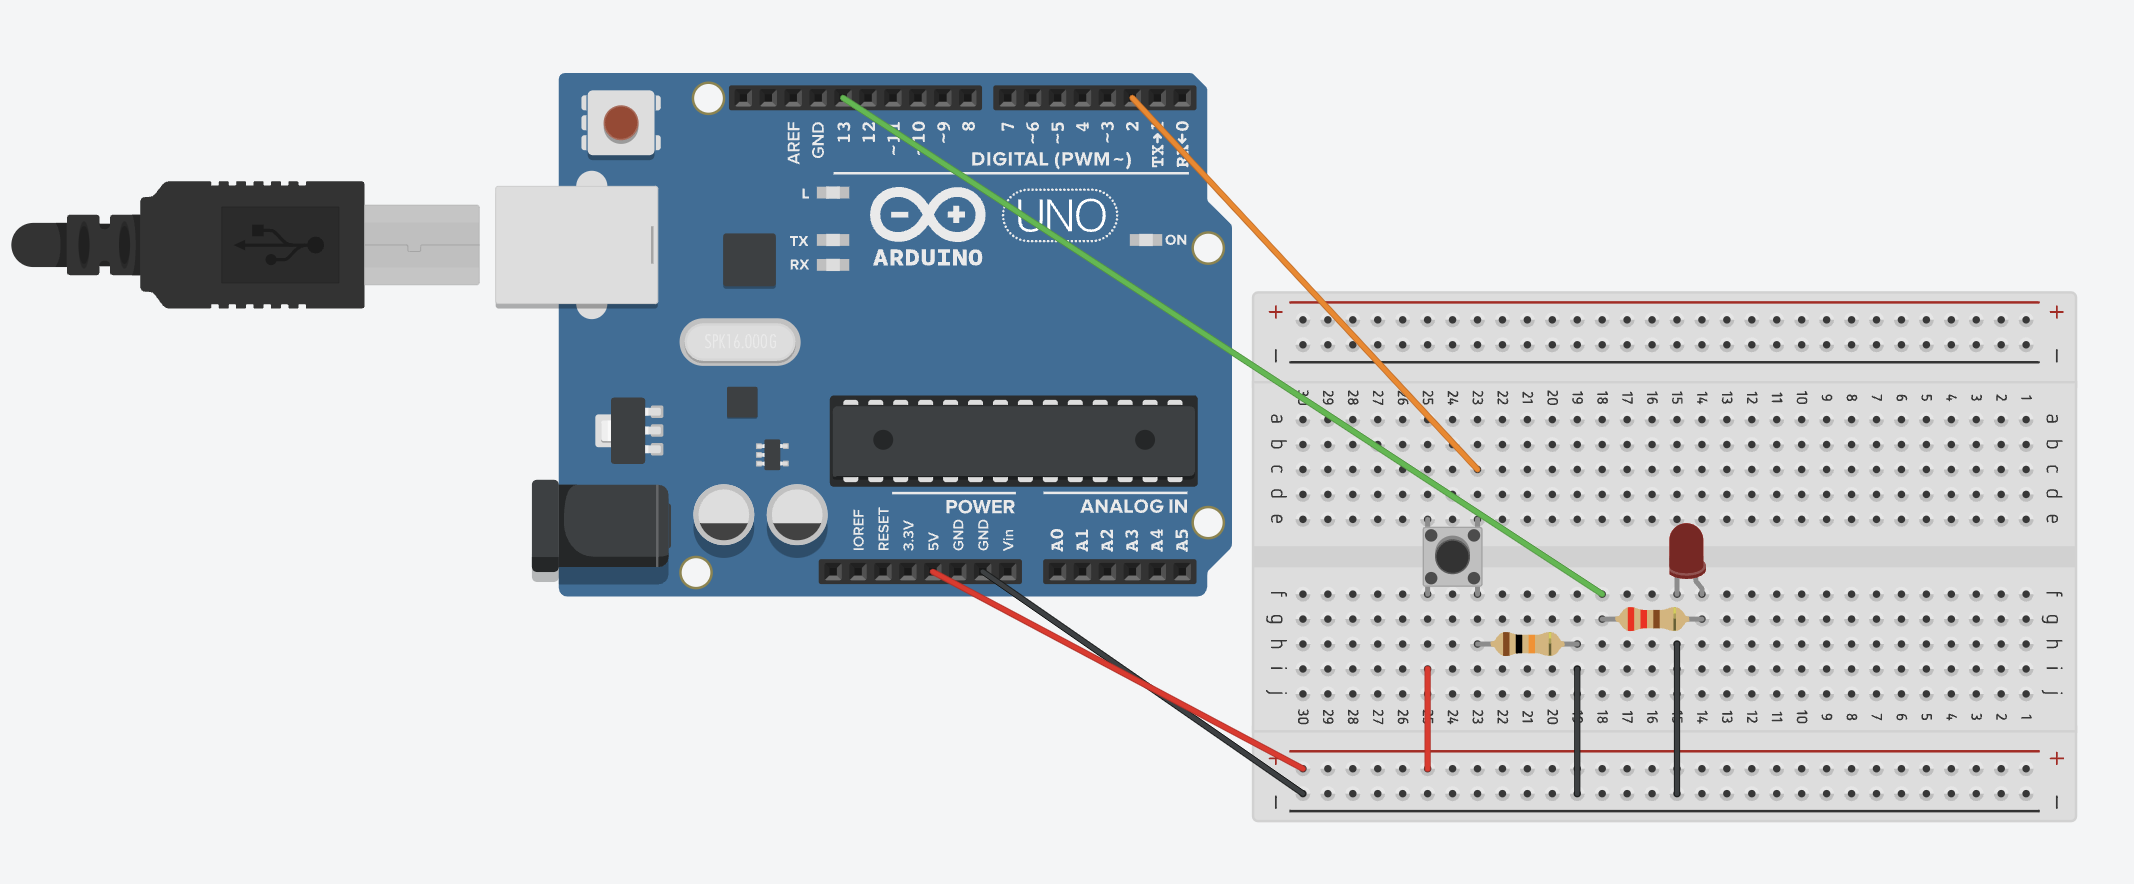
Wiring schematic
Connect the long pin of the LED to Digital Pin 13 on the Arduino via a 220 Ohm resistor on the breadboard as shown in the schematic below
Connect the short pin of the LED to GND on the Arduino via the breadboard as shown in the schematic below.
The push button has four wires and is inserted into the breadboard - the top-right wire is connected to Digital Pin 2 on the Arduino, the bottom-right wire is connected to GND on the Arduino (via a 10K Ohm resistor), and the bottom-left wire is connected to 5V on the Arduino through the breadboard using jumper wires, as shown in the schematic below.
The code
Create a new sketch file in the Arduino IDE software and copy in the following code. Save the sketch file and then upload it to your Arduino Uno board.
Once you have uploaded the code to the Arduino, test it out by pressing the push button to turn the LED on, and pushing it again to turn it off. Make sure you press the button firmly (you may need to hold it down briefly - you can adjust the delay value on line 41 if needed to make sure that the button doesn’t trigger turning the light on/off several times when pressing the button, but also so there is not too much of a delay between the button responding to presses).